This is just a quick how-to on a technique I use to quickly cut shapes in wood. I've used it for decorative shapes on outdoor projects and curved legs on furniture, among other things. It's really a time saver when you need to make several of the same shape, and you can keep the templates and use the curves on other projects down the road. I just re-used a template I made several years ago (for a garden arbor) to cut decorative ends on the cedar beam across the top of a trellis structure.
1. Make the shape. I usually draw the shape at full scale on a piece of graph paper, or sometimes with software, and print it out. Sketchup (free and excellent) or Adobe Illustrator (expensive but powerful) can both be used to make all sorts of curves. Pencils work pretty well, too.
 |
| A template design I made in Illustrator |
2. Cut the template. Plywood or hardboard is best for this, and 1/4" to 1/2" thick is good, depending on the size of the part. You do need to plan ahead a bit here. If you're going to clamp the template to the stock to be cut, you should make it big enough that the clamps don't get in the way of the router. I tend to cut a piece of plywood the same dimensions as the stock lumber, and then about a foot longer than the cutting area will be. Transfer the pattern you drew to the plywood, and cut out the curve with a band saw, jig saw, or coping saw. A quick way to do this is to use spray adhesive to glue the paper down. Cut a little outside of the line, and then finish the curve with a sanding drum. There are cheap sets you can get to go in a hand drill or drill press, or you can invest in a dedicated oscillating sander. One tip: larger drums make smoother curves, so don't try to smooth out a 10" long shape with a 3/4" diameter sander. Take your time and make sure the template is fair and smooth, because every bump will be faithfully transferred to your final work.
 |
| Trace the pattern first |
3. Prepare the workpiece. You should rough-cut the curve with a bandsaw or jigsaw, within 1/4" of the line. I usually just hold down the template, and trace it quickly with a pencil. I also make hash marks on the waste side, which seems silly until you accidentally cut on the wrong side of the line because you got in a hurry. You could skip right to step four, and do all the cutting with the router, but your results will be much better and your router and bit will be much happier if you're not hogging out huge amounts of wood. If you're using a small router, this is a mandatory step.
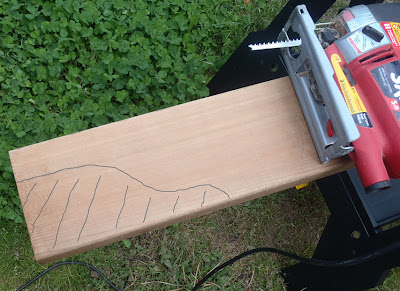 |
| Hash marks on the waste side prevent expensive mistakes |
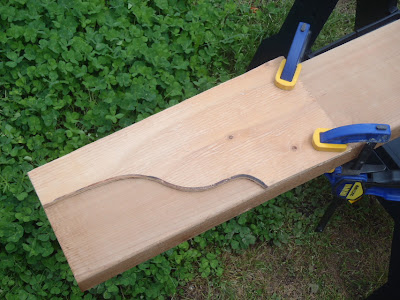
4. Attach the template to your workpiece. I usually just clamp the template in position. If some small holes are something that can be dealt with, sometimes it's good to use a couple of small #4 or #6 flat-head screws countersunk into the template. The router base can run right over them, and they can be used to fasten in the middle of a large or odd-shaped piece. When deciding how to attach the template, consider the cutting direction of the router bit. You want it to be working with the grain of the wood as much as possible, to avoid chattering and splitting.
 |
| Ready for the router |
5. Cut it! My weapon of choice for this one is a 3/4" diameter x 2" template cutting bit with a bearing at the top (Whiteside #3023) in a fixed-base router. Set the height so that the bearing runs along the template and watch the bearing as you cut, not the cutter. Again, watch the grain direction and try to cut with it. You might need to climb cut around some curves, which is no big deal if you pre-cut the shape fairly closely.
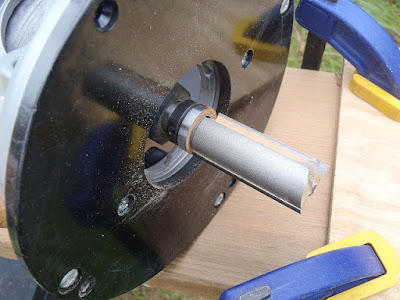 |
| A big bit gets the job done easily |
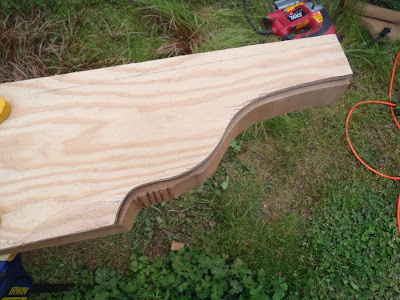
Ta-da! I usually leave the edges crisp and smooth from the router, but a quick pass with a roundover bit or hand sanding will make a smooth edge if you want. Otherwise, there's no more woodwork required.
 |
| No sanding required |


